
18 min to read
MicroPaaS with Rio from Rancher
Vous pouvez trouver la version française ici.
The purpose of this article is to explain how to experiment with the Rio tool which includes many features. Feel free to go to the table of contents if you are only interested in certain parts.
Introduction
What is Rio?
Rio is an application deployment engine for Kubernetes or MicroPaaS. It manages for you:
- Which relates to routing and load-balancing
- The auto scaling
- Continuous deployment from Git
- Blue/Green deployment

It’s typically part of the DevOps movement and can provide a simple Kubernetes alternative to systems such as CloudFoundry or Azure Web Apps.
Concepts
Let’s clarify a few Rio concepts before we start:
- Service : set of identical scalable containers
- Router : load-balancing and traffic rules management
- External Service : registration of IPs or domain names in a service mesh
- Stack : representation of a Riofile
Tools used in this article
- Rio from Rancher: Application deployment engine for Kubernetes (still in beta)
- Civo: Cloud platform from the UK which offers a way to deploy k3s clusters in a few seconds (still in beta)
- Cloudflare: proxy with firewall, certificate and domain management
Why do we need an online cluster
Rio takes care of many things for us including the attribution of a domain name “on-rio” as well as its wild-card certificate (interesting for both development and production environments).
You must have a public fixed IP to allow Rio to provide this to you, which an online platform such as Civo allows you to get.
Setting up the Kubernetes cluster
Go to the Civo interface to create our cluster. We have the choice on the size of the cluster as well as the power of each node. For this article I will choose a cluster with two Medium nodes (a master that can be used as a worker as well as another worker). Using only the master node is sufficient for a development or test environment.
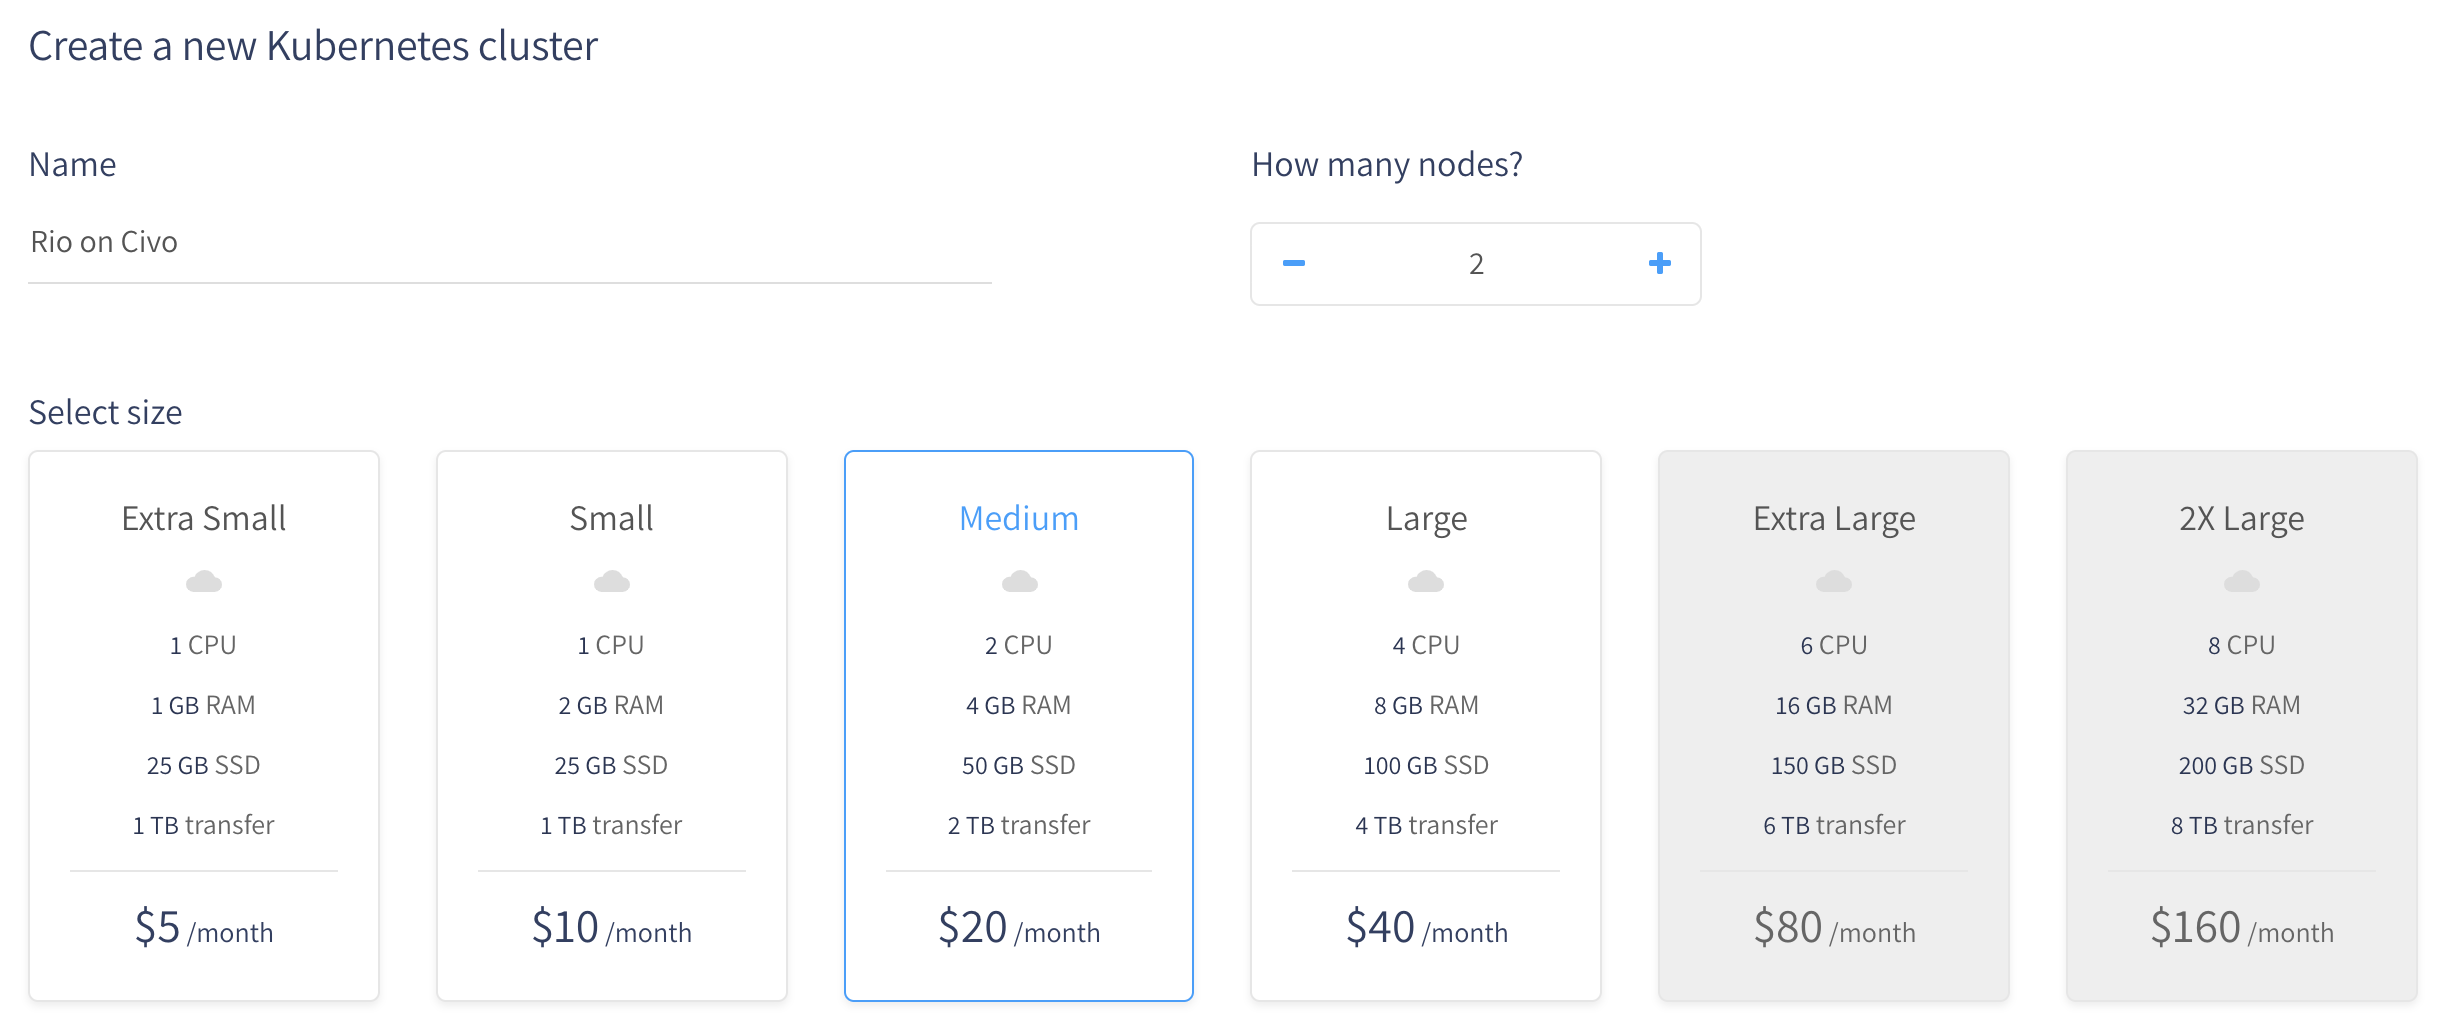
Don’t worry too much right now about the number of nodes you need because you will be able to add or remove them as you wish.
Civo also offers you the option to preinstall applications. By default “Traefik” and “Metrics Server” are installed and I also got into the habit of using Rancher as an interface for my clusters but we don’t need any of that because all needed features will be installed by Rio. Make sure you have unchecked all applications.
We can now click on the “Create” button and wait a moment for our cluster to be ready.
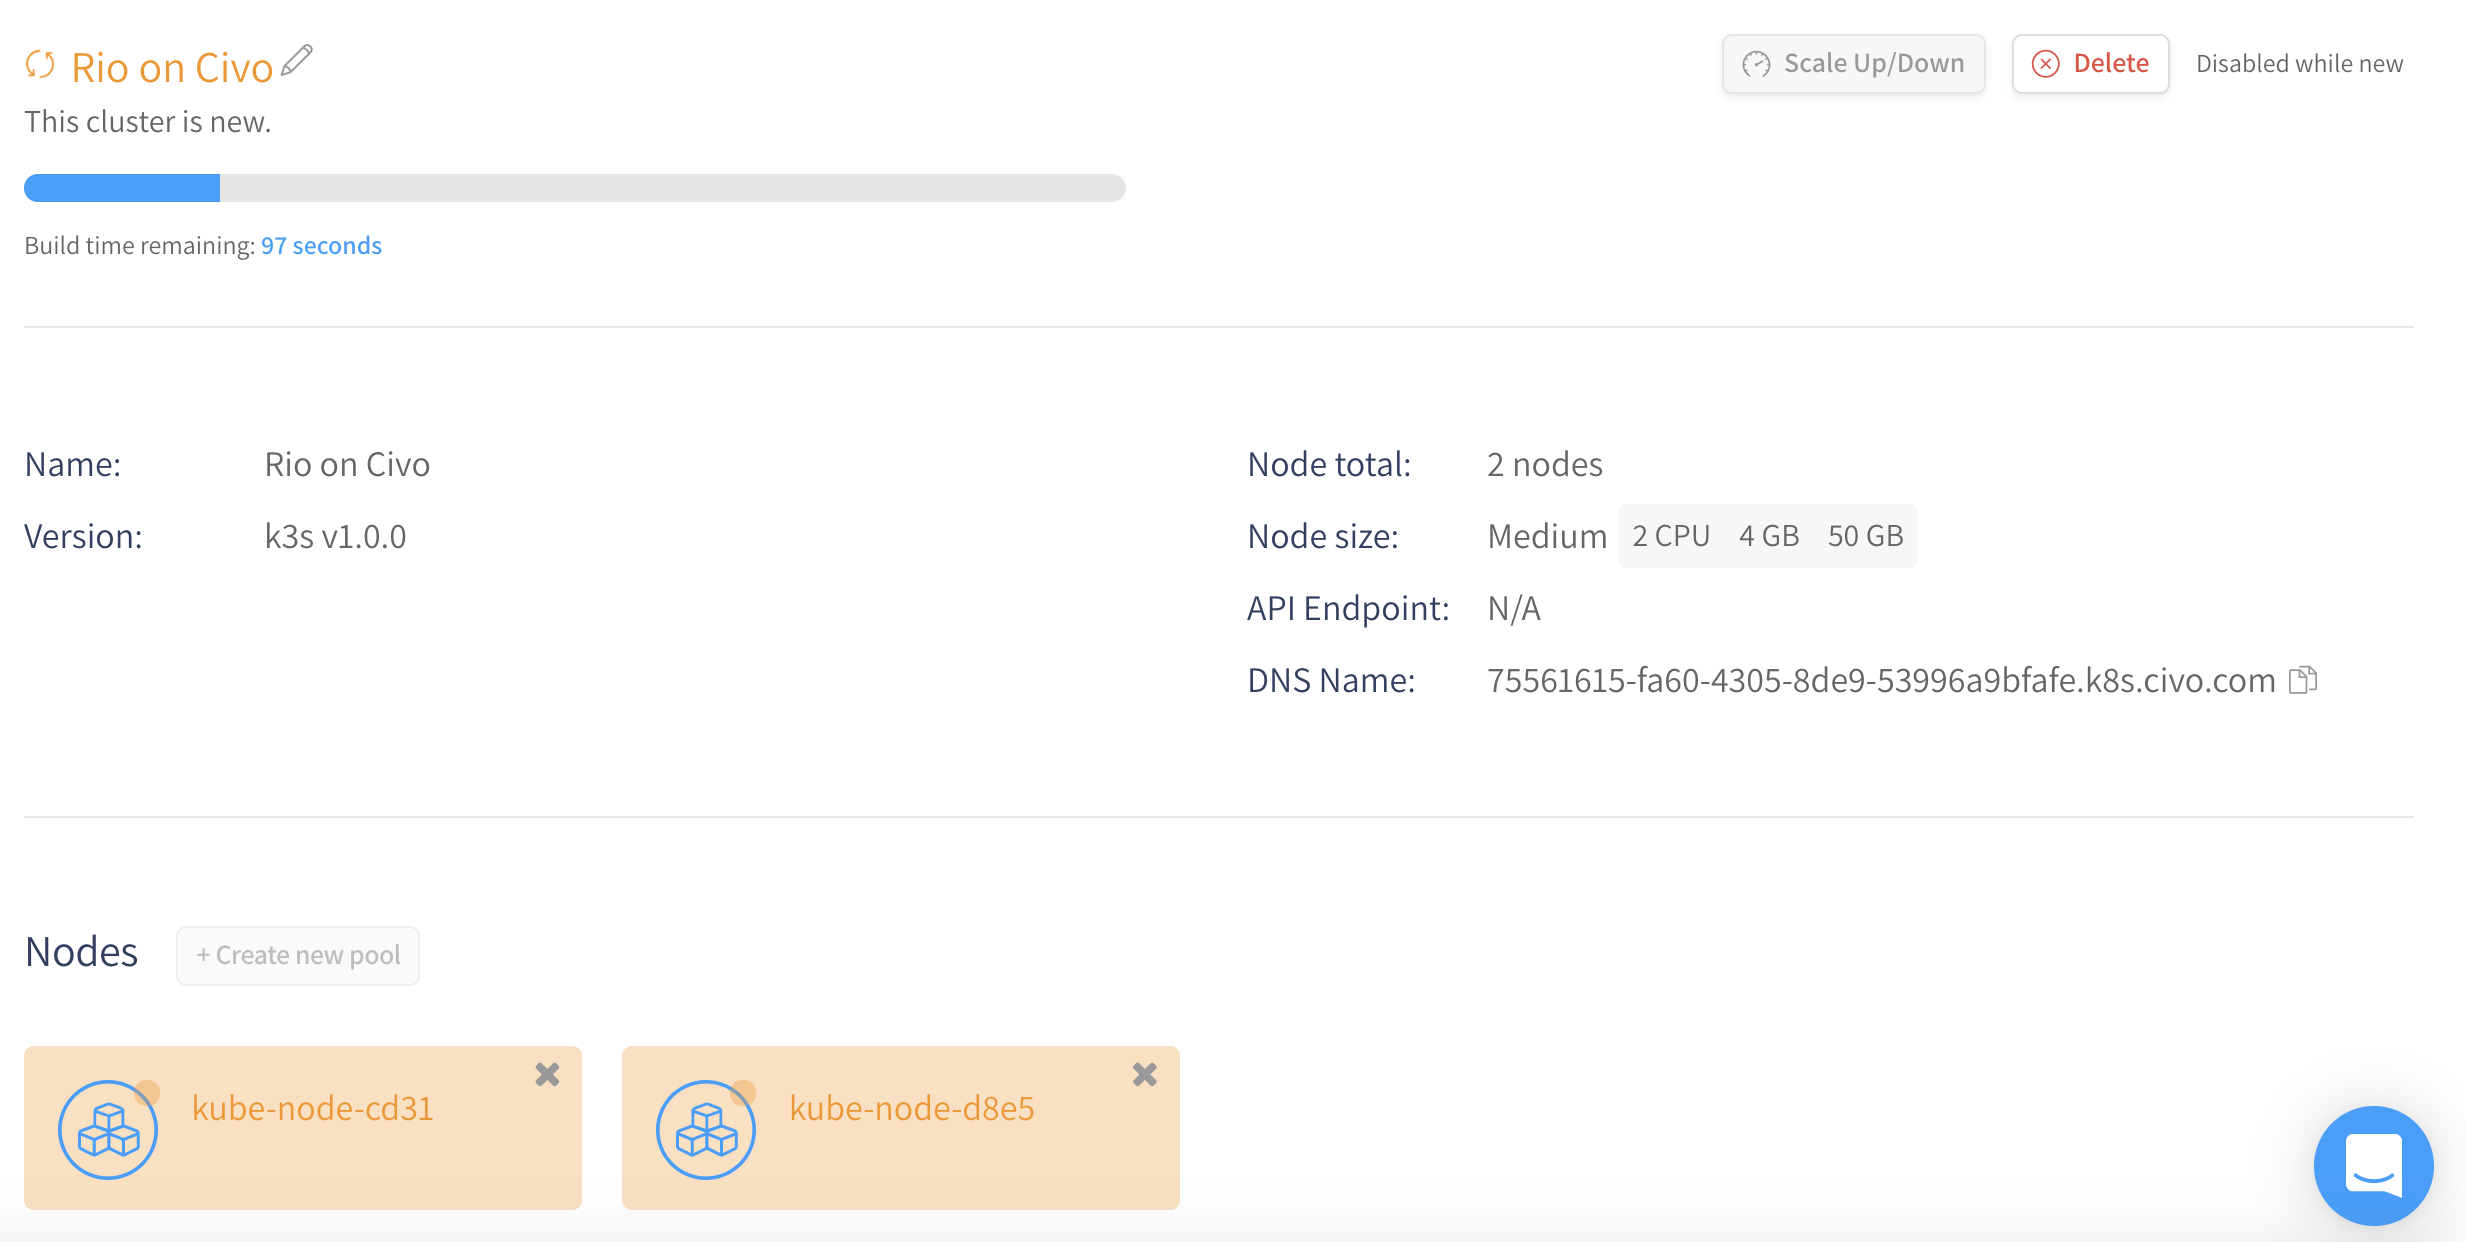
Once the wait is over, you will be able to download the kubeconfig to allow you to access to the cluster from the kubectl CLI.
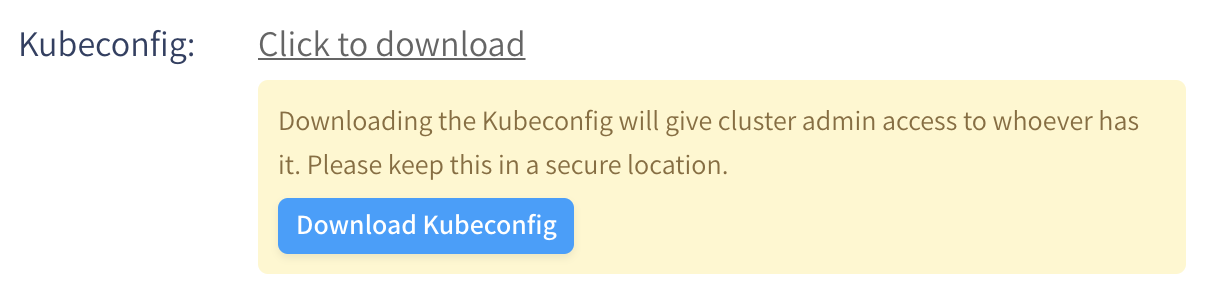
The provided file is called “civo-rio-on-civo-kubeconfig” because I named my cluster “Rio on Civo”.
You can easily use this file by adding the --kubeconfig parameter to each kubernetes CLI or by using the KUBECONFIG environment variable.
Examples:
kubectl --kubeconfig civo-rio-on-civo-kubeconfig get pods -Ario --kubeconfig civo-rio-on-civo-kubeconfig ps
Or
export KUBECONFIG=civo-rio-on-civo-kubeconfigkubectl get pods -Ario ps
To focus on commands, I use the environment variable and therefore would not specify the --kubeconfig configuration in the rest of the article. Add the flag each time behind the word rio if you don’t know how to create an environment variable on your OS.
For example, rio ps in the article gives rio --kubeconfig civo-rio-on-civo-kubeconfig ps.
Rio installation
Rio CLI
The Rio CLI allows you to install Rio on your local machine and is compatible with all Operating Systems running on amd64 or arm.
You can use the curl -sfL https://get.rio.io | sh - command (the script automatically detects the release to use) or install it manually by downloading the realease compatible with your local OS here. I personally chose the script because I’m on macOS.
Installation on the cluster
The installation on the cluster is as simple as for the CLI, one command is enough (install):
rio install --email your@email.com
The --email flag will be used for the certificate request to Let’s Encrypt.
By default all features are installed. You can disable ones you don’t need or want using the --disable-features flag.
If you use your own domain and wild-card certificate you can, for example, add --disable-features rdns, letsencrypt to your command.
You can also have more parameters if you want by using the --yaml flag which creates a yaml without applying it. You will then need to apply it after making the desired changes.

You can check that everything went well with this command (pods):
rio -n rio-system pods

You are already ready to deploy an application.
Deployment from Github
The application that we are going to deploy is the minimalist demo provided by Rancher: https://github.com/rancher/rio-demo.
Repo composition
You notice that there are only 2 files:
main.goa basic web service in GoDockerfilehow to create an environment to run the Go service- The Dockerfile includes the way to build
RUN [" go "," build "," -o "," demo "]the project as well to executeCMD [ "./demo"]it.
- The Dockerfile includes the way to build
This structure shows another strength of the containers which is being able to create a reproducible environment.
Deployment
Because the repo is public we only have to execute a command (run) that refer to it.
rio run -n cd-demo -p 8080 https://github.com/rancher/rio-demo
Here we have decided to publish our service with the name “cd-demo” and we map port 8080 to public port 80.
It’s also possible to map other ports using for example -p 81:8081.
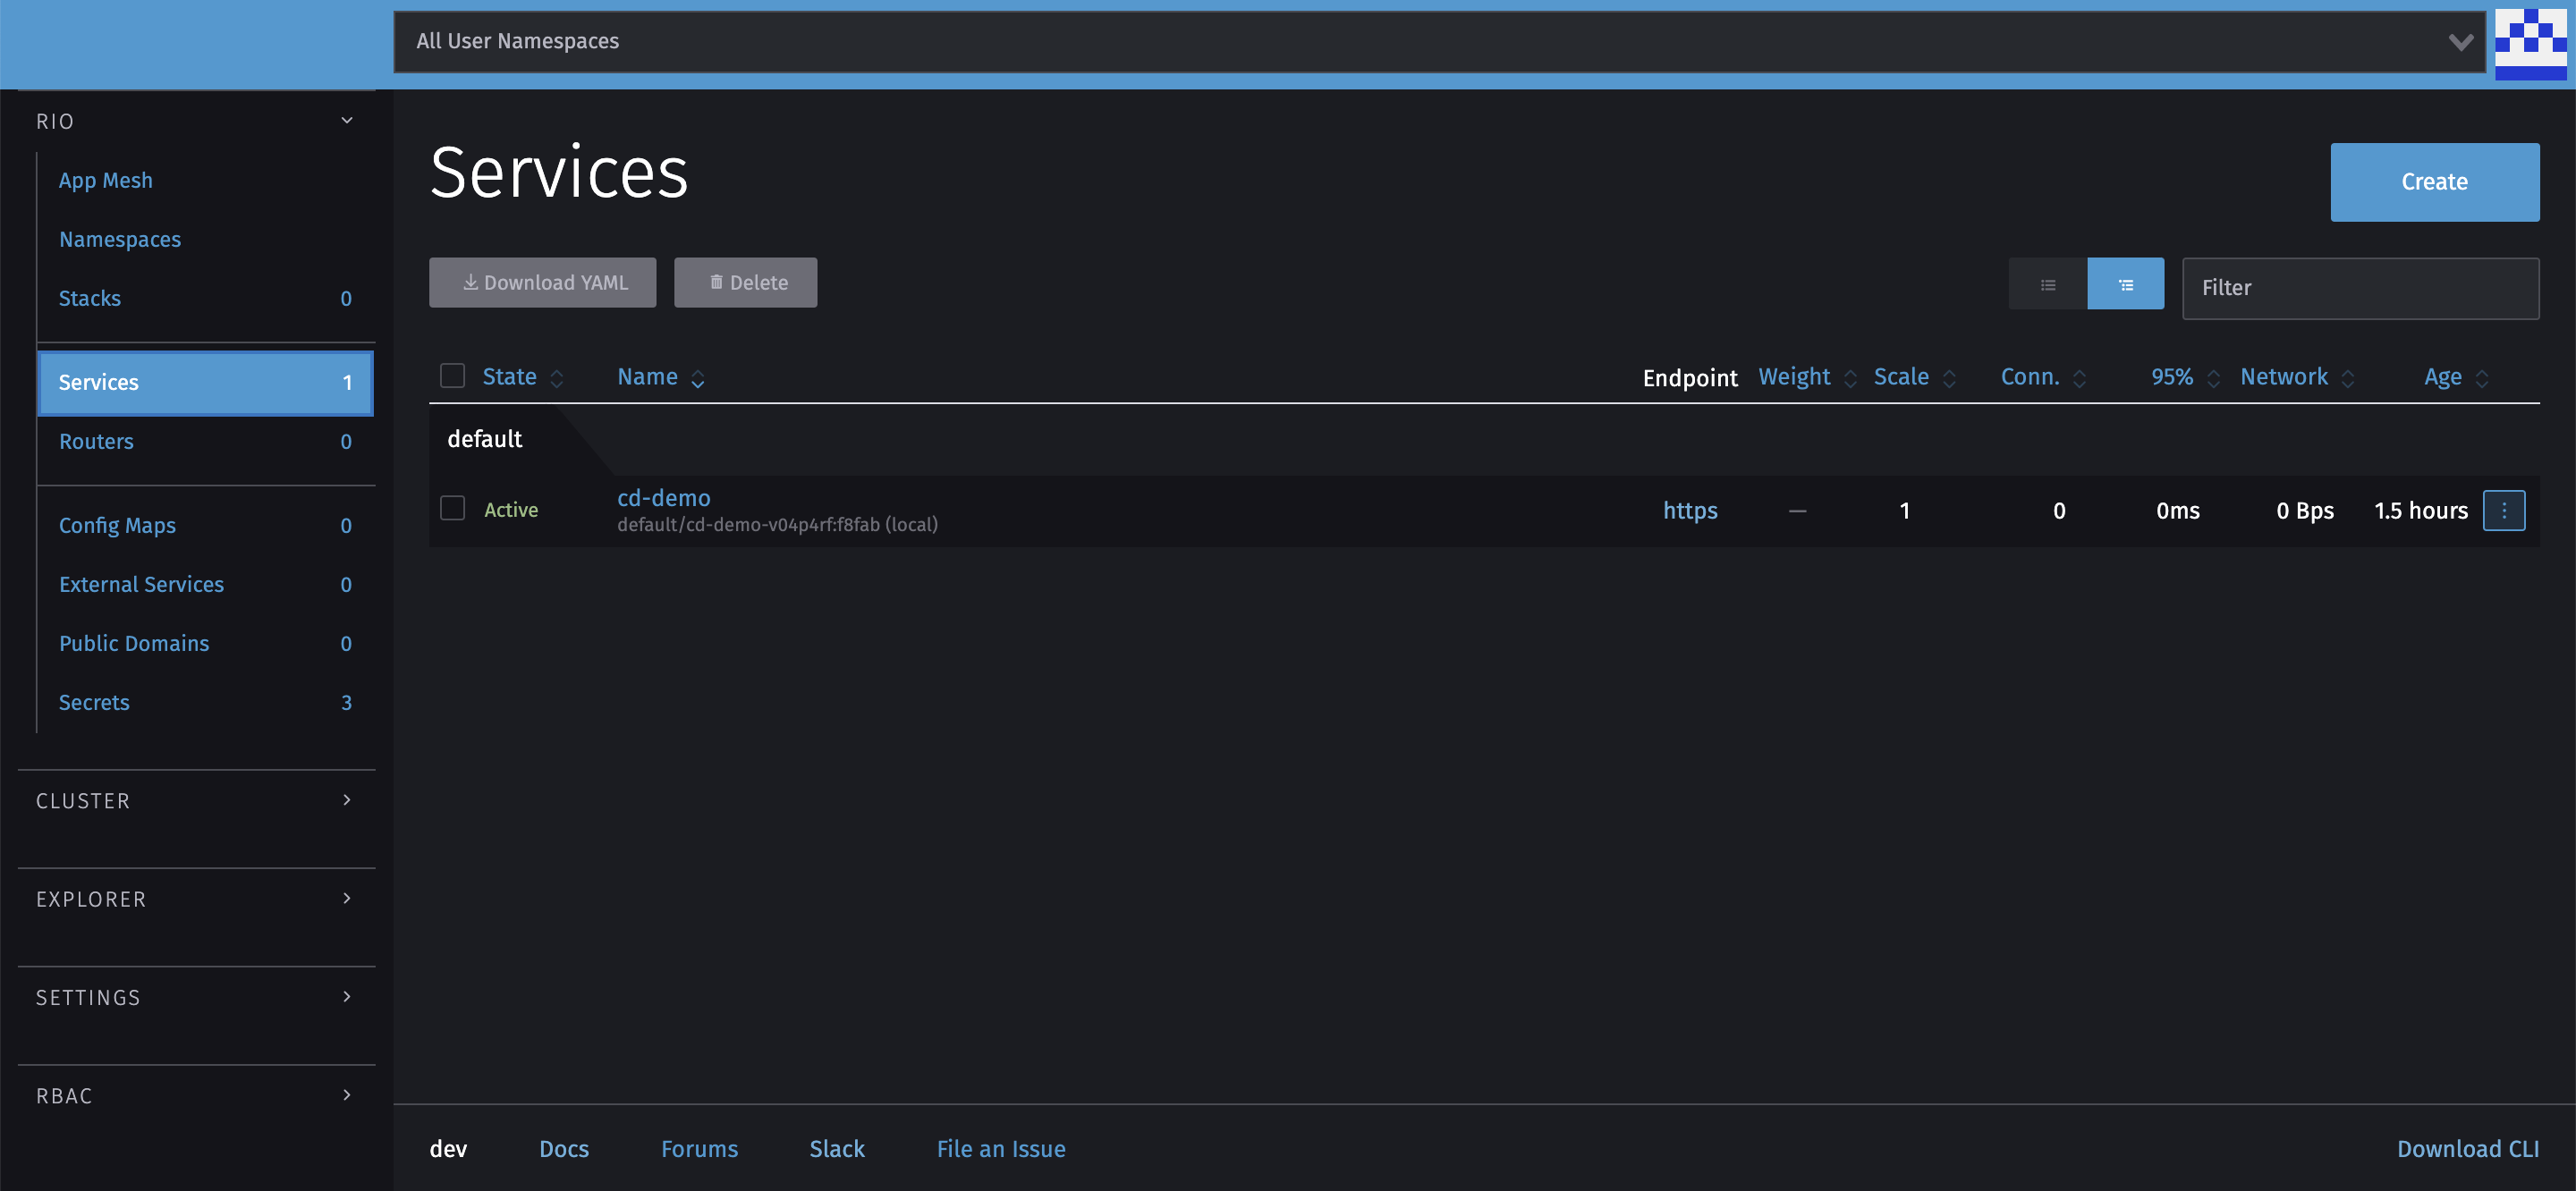
All you have to do is execute the ps command to retrieve the information from the application you just deployed.
rio ps

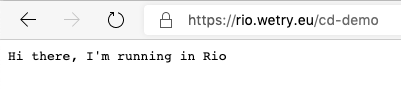
Go to the indicated url when the build and deployment are complete and you should have a nice little message provided by a secure site via https.

With this unique command you have not only generated and deployed your application but you have activated a continuous deployment because Rio will check every 15 seconds if a change has been made on git in order to update the application.
You can thus execute this command several times for several namespaces with different branches to deploy your different environments.
Use a private (secure) Git
Several types of authentication are possible: Basic or SSH.
Basic authentication
This method allows you to use the other commands as before without changing anything.
To save your authentication data in Rio, use the command (secret):
rio secret create --git-basic-auth
You will need to provide a URL informing which git to apply this secret to. The other commands are not changed as said above.
SSH authentication
To store the SSH key, you must also use the secret command but with the --git-sshkey-auth flag:
rio secret create --git-sshkey-auth
The command to launch a service changes a little to inform that you must use an SSH connection:
rio run --build-clone-secret gitcredential-ssh -p 8080 git@github.com/rancher/rio-demo
Other secrets
Other types of secrets exist such as connection to a private docker registry.
You can see the different possible types of secrets using the help command: rio secret create --help.
Don’t hesitate to take a look in the documentation for more information.
Pull Request
A strong point of Rio is that it can provision an instance for each Pull Request. This allows you to see the result before merging without having to launch the application locally.
Webhook configuration
To do this, you must create an access token on Github

and create a webhook secret again with the same command and the --github-webhook flag:
rio secret add --git-sshkey-auth
Deployment for PR
Use the run command with a new --build-pr flag
rio run -p 8080 -n example-cd --build-webhook-secret=githubtoken --build-pr --template https://github.com/rancher/rio-demo
Want to know more about --template? Check this.
Dashboard
I think it’s now time to inform you that there is a web dashboard allowing you to visually monitor your applications.
To keep it simple we can install it with a single command (dashboard):
rio dashboard
The dashboard is installed but still not responding? Wait a little longer, the Dashboard takes longer to launch. You can check the launch of the dashboard using the rio -n rio-system pods command already used previously
You can find there everything you have done so far. The dashboard also allows you to deploy your applications without going through the CLI but is less stable. Remember that this is a beta version.
Deploy a Docker image
It’s as easy to deploy from a Docker image with Rio as it is to deploy this image on a local Docker. This is the same command (run) as for deployment via github and Rio automatically detects that it’s an image name and not a Git link.
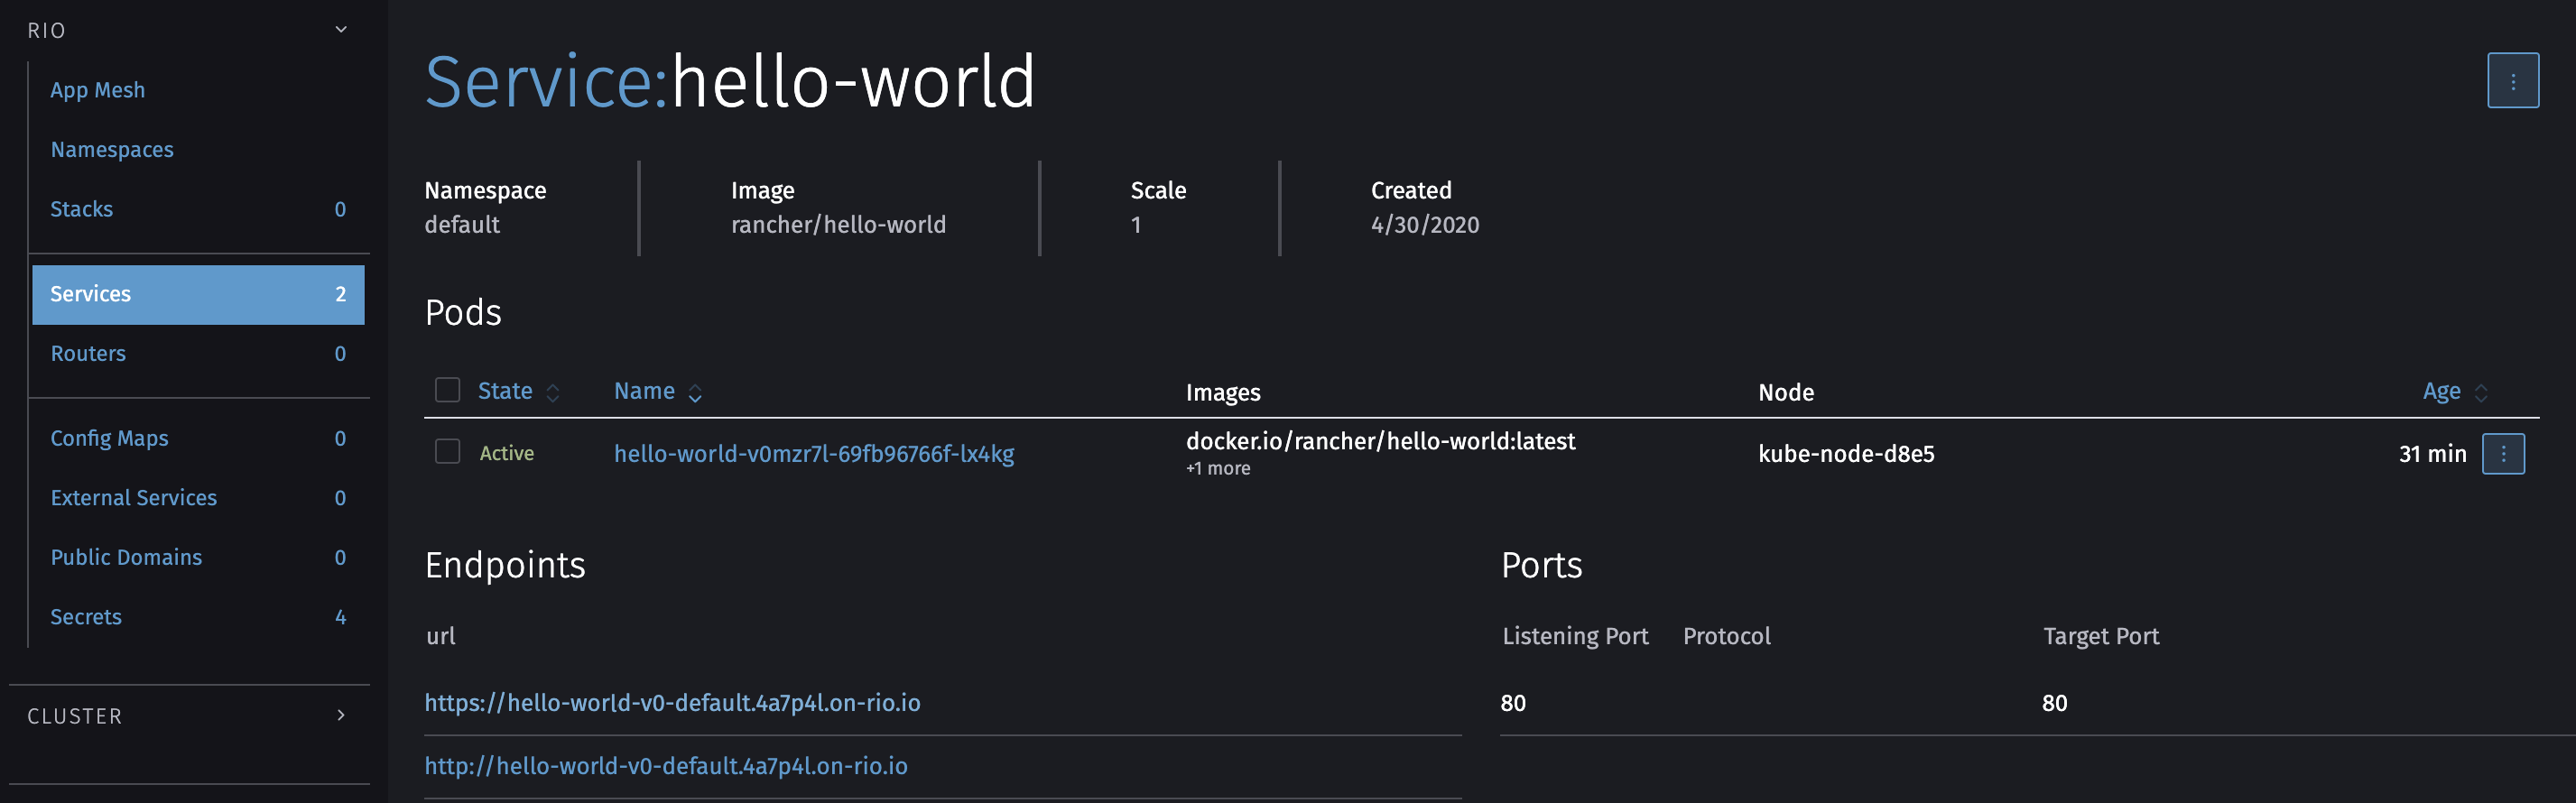
We use this command to deploy the example image hello-world of rancher:
rio run -n hello-world -p 80 rancher/hello-world
You can obviously use environment variables using the --env and --env-file flags.
You can use ps to get the domain name as done previously or check the list of services in the dashboard.
Deploy a local application
This point is one of those that I absolutely wanted to experiment because if there is something that bothers me for debugging environments: it’s the fact of having to go through an image registry to be able to test a deployed application.
Fortunately Rio does everything for us using a local registry.
I take this opportunity to speak about another point which is the RioFile. It is a yaml file quite similar to a docker-compose one.
services:
  dev:
    image: ./
    port: 8080/http
This file creates a service named “dev” based on image. The image can contain the name of a Docker image available in a register or a relative path. The relative path tells to Rio that it has to build the image itself.
This is the smallest Riofile file we can make. There are 1001 other options that you can specify in this file, so I invite you to go and discover them in the official doc.
The location of your folder (./ In this case) must of course contain the source code of the application as well as a Dockerfile just as we saw in the Repo composition section.
It only remains to execute the up command to deploy our application.
rio up
We can then see all the steps by which it proceeds:

You can execute yourself one of the 2 steps through which it goes:
rio build: image buildrio run -p 8080 localhost:5442/default/dev:latestdeploy the previously created image
Scaling
Scaling is the fact of having several instances of the same service running in order to be able to more easily absorb the compute requests by distributing them to available hosts.
It can be managed in any way of creating a service: run command (--scale), Riofile (scale or autoscale) or via the dashboard .
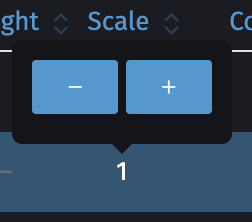
Manual
Scaling is managed when creating a service and it will be automatically set to 1 if you don’t specify anything.
Don’t worry, you can change the scaling after its creation too using the scale command.
rio scale hello-world=2
This will launch a second instance of the “hello-world” service.

You can also do it via the dashboard.
What is interesting with the hello-world of Rancher is that you can test the load-balancing between the two instances by refreshing its web page several times. The name behind “My hostname is” is unique per instance.

Automatic
The word “automatic scaling” may seem complicated at first but with Rio it’s as simple as manual scaling. The only difference is that we have to specify a range (example: 1-10).
There are two types of auto-scaling:
- cold (from 0):
0-10 - hot (from at least 1):
1-10
Please note that with cold auto-scaling there will be a latency of around 10 seconds while an instance is launched if none is running when requested.
In order to test it you can use the command tool hey which allows you to create a large number of simultaneous connections:
hey -z 3m -c 100 https://hello-world-v0-default.4a7p4l.on-rio.io/
You should see the number of instances (replicas) rise progressively with the command ps:
rio ps

Router
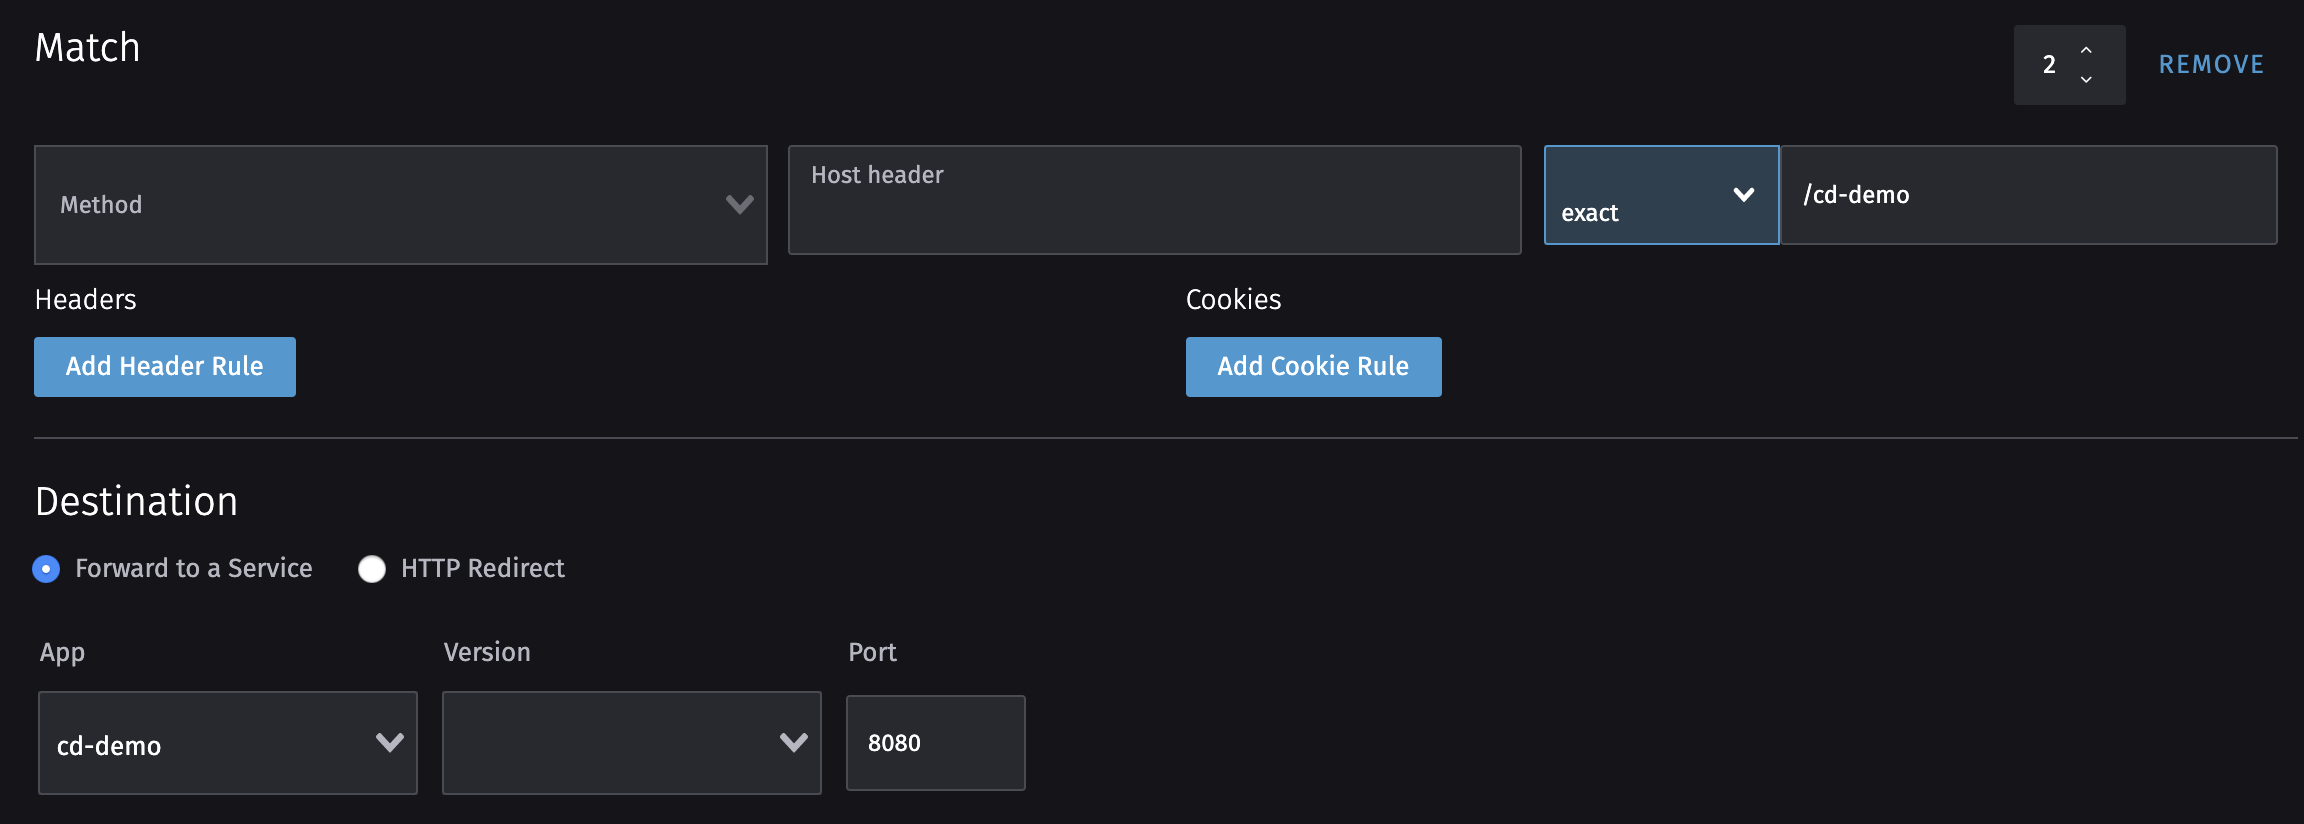
Rio uses the Gateway API Gloo which allows you to add rules based on headers, path, cookies and more.
Let’s start with a specific case: give access to our two applications (cd-demo and hello-world) from the same subdomain with two different paths.
We will use the route add command this way to create a routing rule based on a path: rio route add $name/$path to $target.
$name: has to be replaced by the name of the router (is used to create a subdomain)$path: has to be replaced by the path on which you want your service to be accessible$target: has to be replaced by the name of the service to point
Let’s create our first redirection of the hello-world service on the subdomain test-default (test = name of the router, default = name of the namespace) on the path/hello-world.
In other words https://test-default.<rio-domain>/hello-world.
rio route add test/hello-world to hello-world
To make sure the route is created you can use the routers command:
rio routers

We can do the same with “cd-demo” but with one exception: We must specify the port because this application listens on port 8080.
rio route add test/cd-demo to cd-demo,port=8080
We now have an application that responds under the path https://test-default.<rio-domain>/cd-demo.
Again, I prefer the CLI rather than the dashboard but everything is doable via the latter.
I don’t need to go through all the mechanisms now you understand how the router works. I suggest you go to the official documentation to find out about them.
Your domain
The easiest way to use your own domain is to add a CNAME record that point to your xxxxxx.on-rio.io domain (findable from the rio info command).
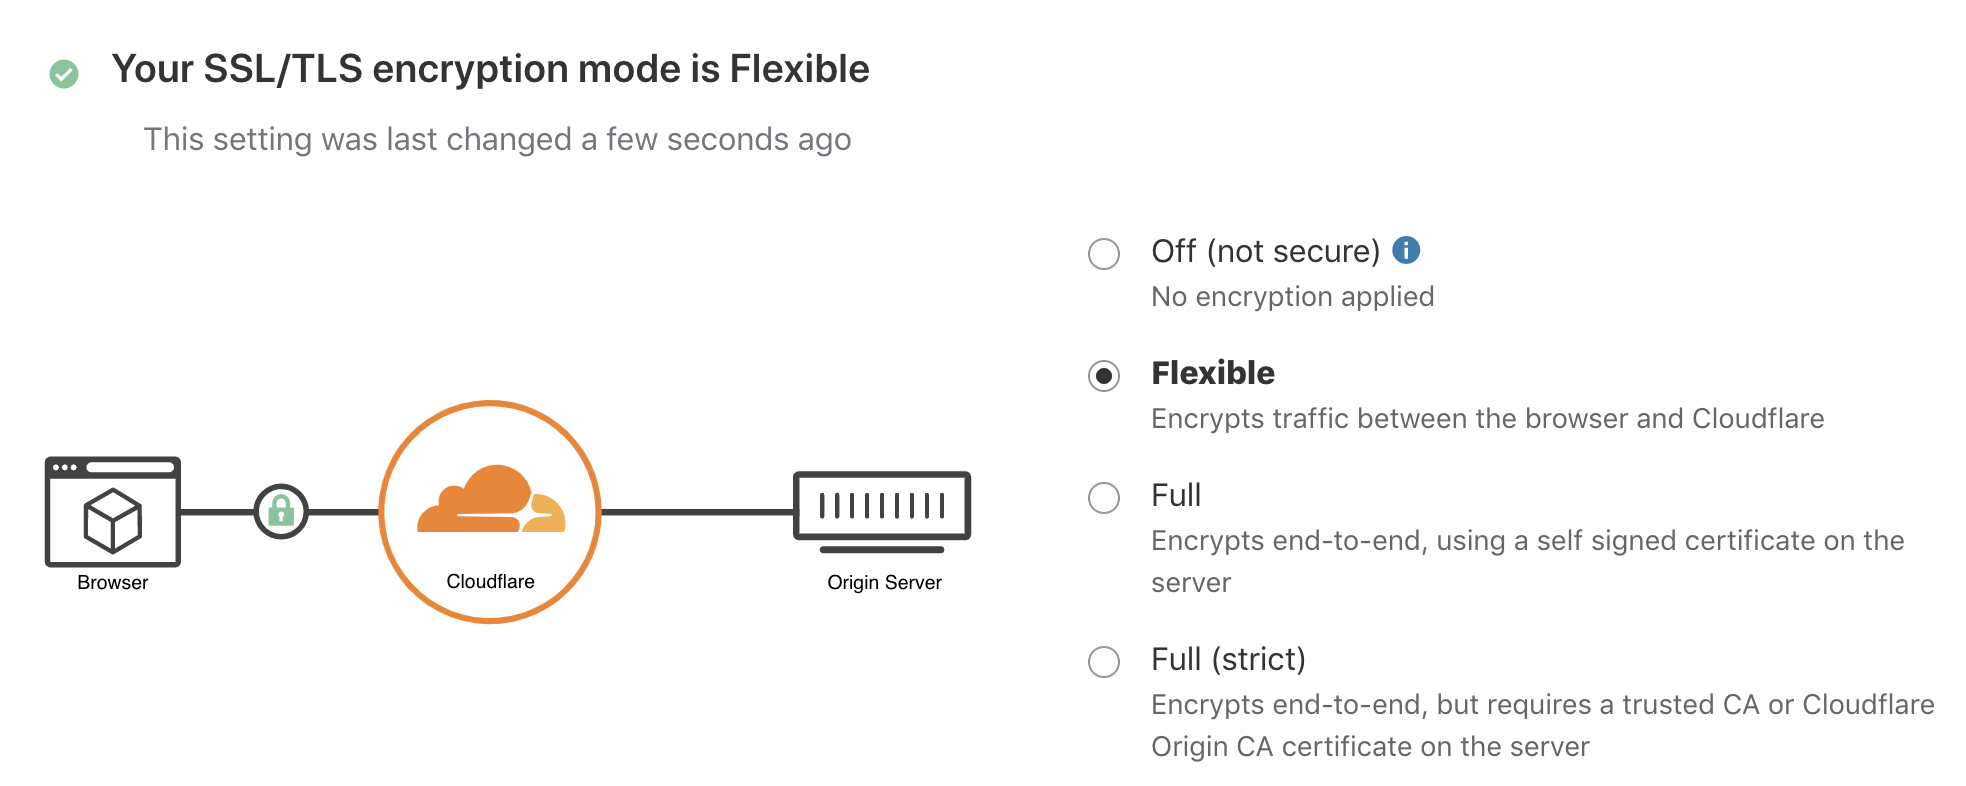
I suggest that you use the free CloudFlare service to avoid any certificate problems.
To do so go to the DNS section to add the CNAME.

Here I have configured my domain so that “rio.wetry.eu” proxies to “test-default.4a7p4l.on-rio.io”.
Make sure you have chosen “Flexible” as the encryption mode. This means that there will be encryption between our server and Cloudflare, and an encryption between Cloudflare and our browser, but not directly between our server and browser.
We just have to register this new domain in Rio using the domain register command.
rio domain register rio.wetry.eu test
“test” is the name of the route created previously
External services
The purpose of this functionality is to avoid playing with IPs or domains in our applications/services. You can manage them in a centralized place.
It is useful for communication between Kubernetes namespaces, but also for accessing real external resources to the cluster.
Other namespace
Imagine that we have an application app2 in another namespace called namespace2, it’s possible to access it for example with the name ext2 via the external create command by this way:
rio external create ext2 namespace2:app2
IP or domain name
To access an external service via a name (for example: ext1) we also use the external create command by providing it with one/some IPs or a domain name:
rio external create ext1 1.1.1.1 2.2.2.2
Monitoring
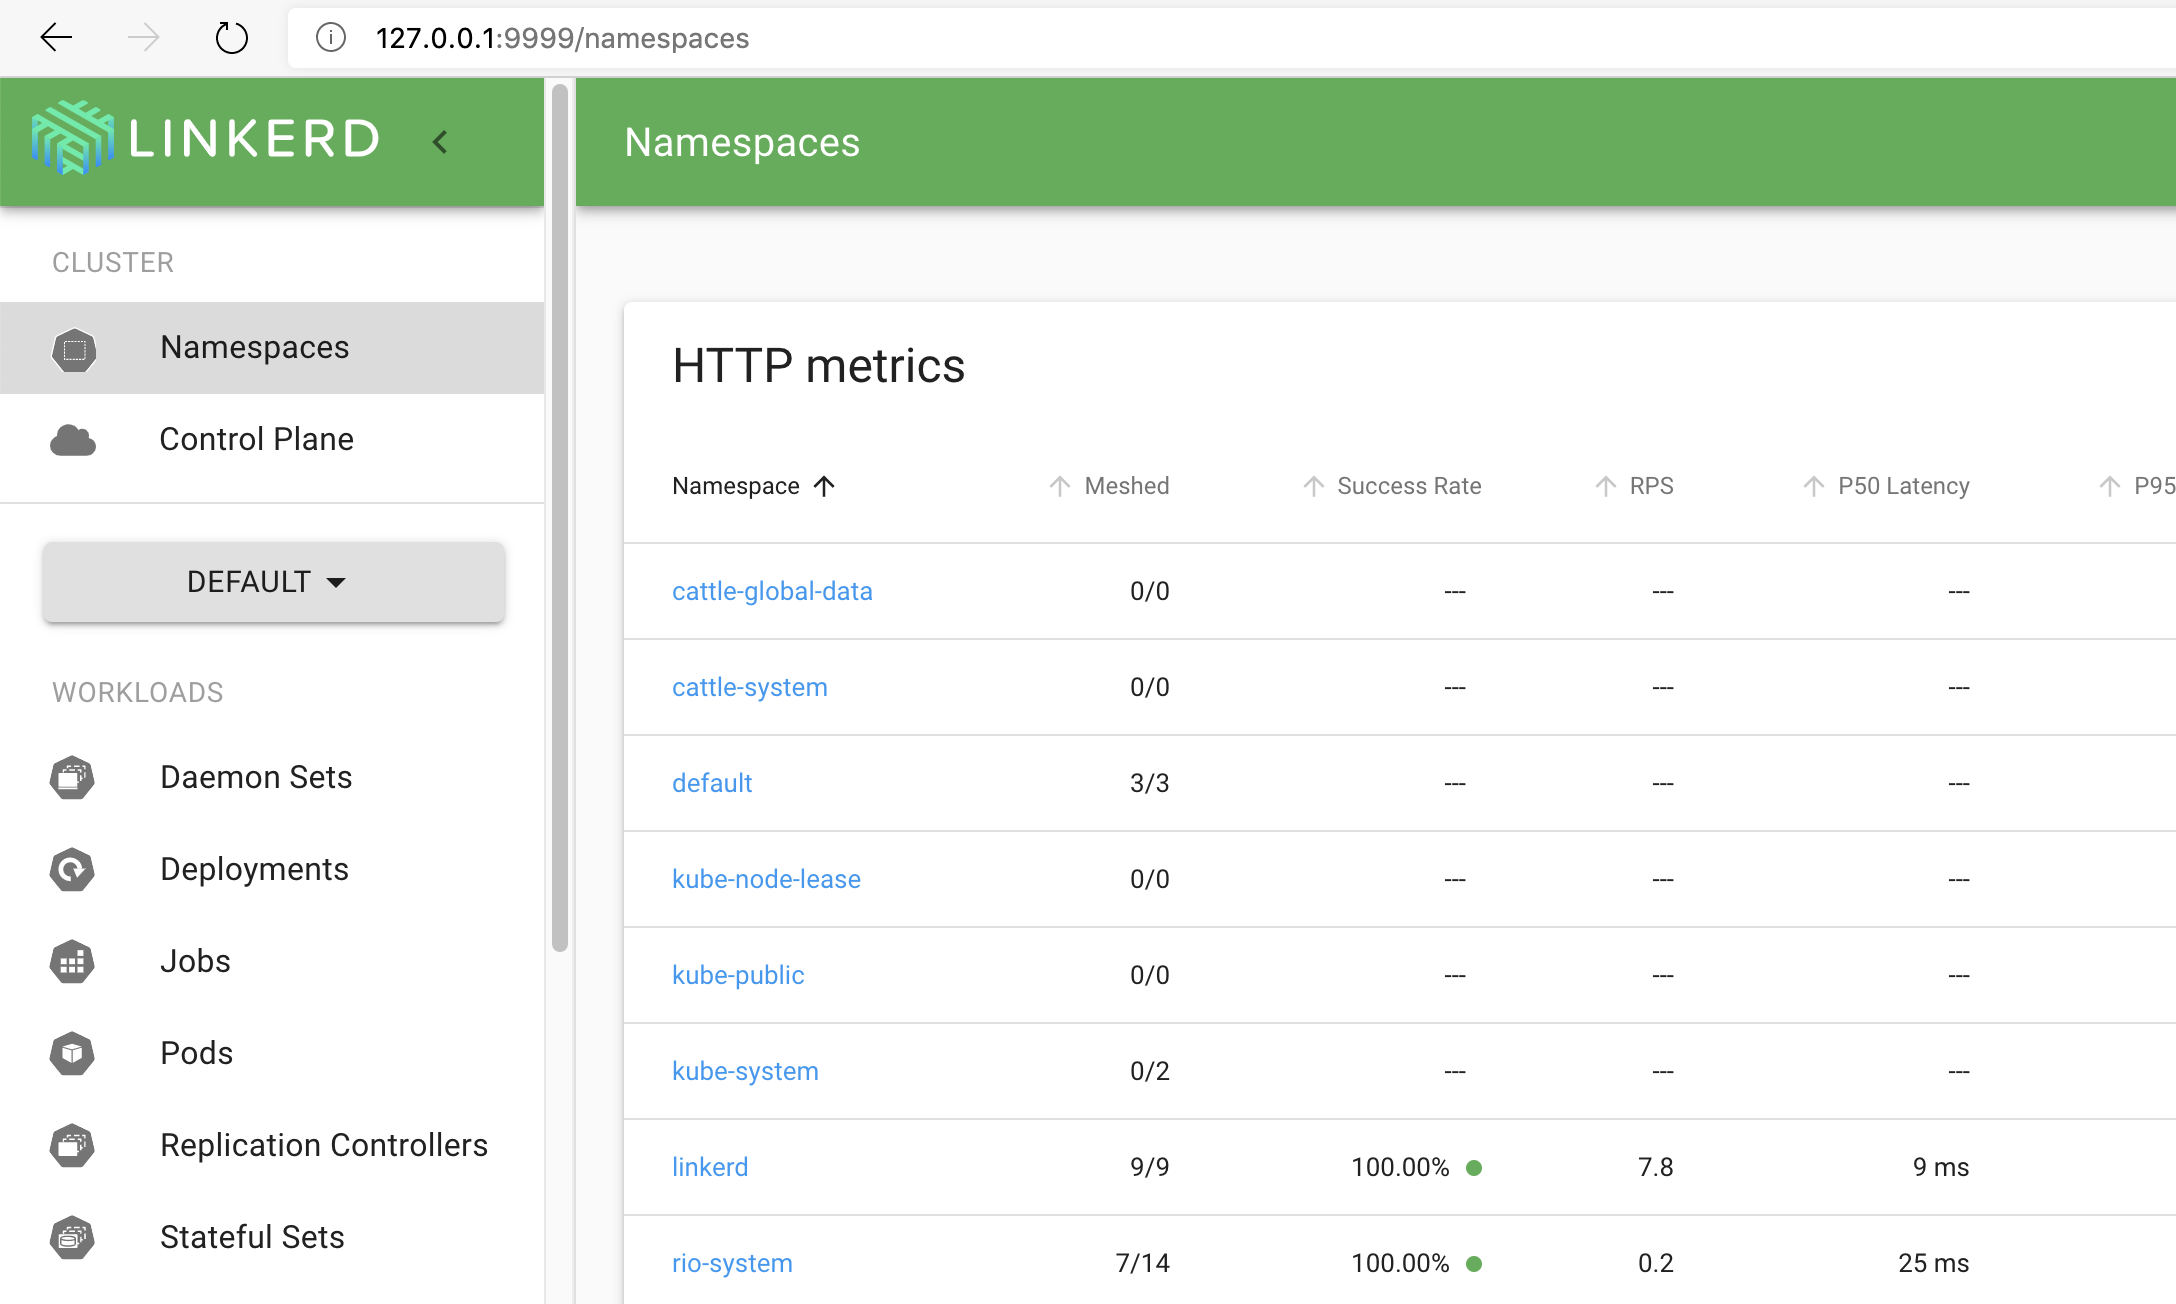
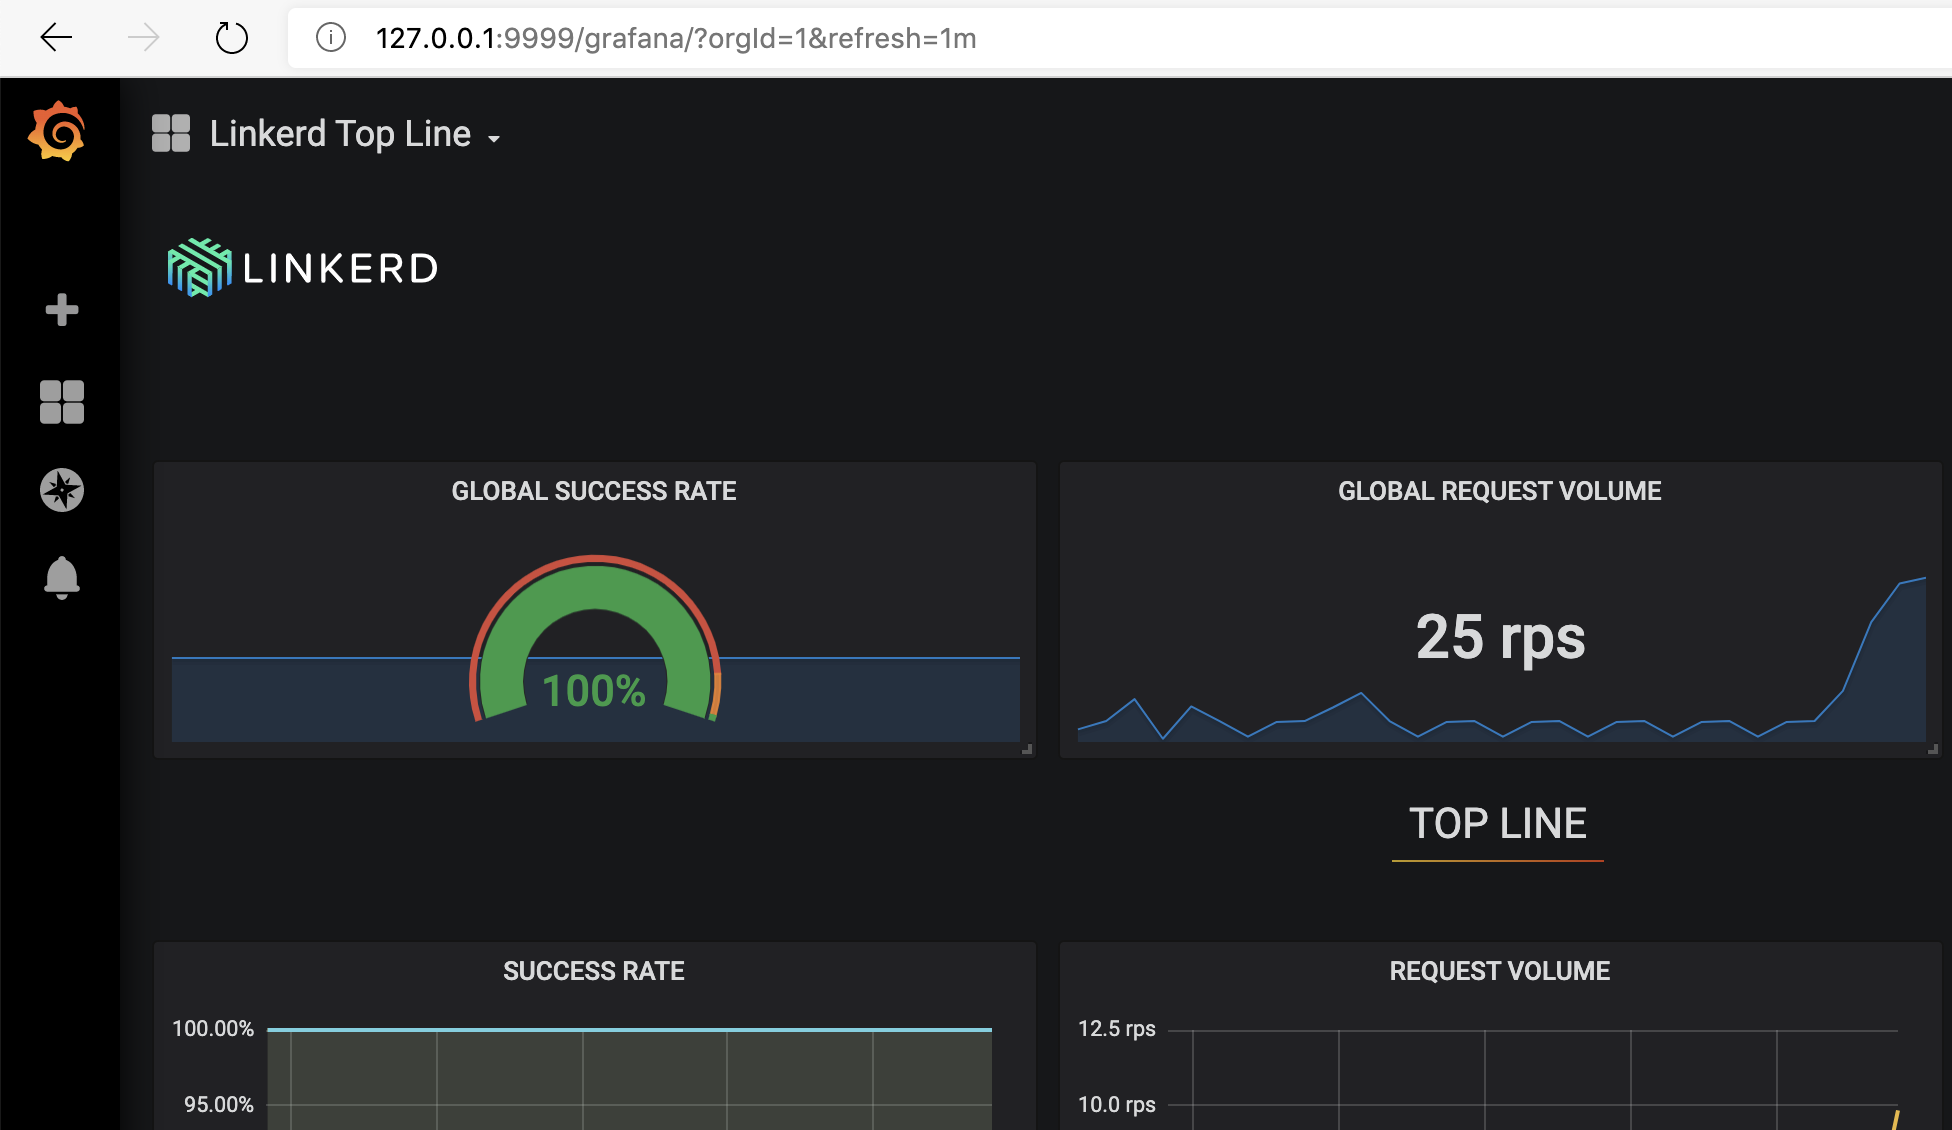
It’s possible to have access to the Linkerd as well as its Grafana service by using the command linkerd which creates a proxy between linkerd and your local network (127.0.0.1).
rio linkerd
Linkerd
Grafana
Next steps
A second part of this article will arrive later because we still have some features of this excellent tool to see.
for taking the time to read this article
Table of Contents

Commentaires